
+86 181 4337 0772

hehaixiong@hykygz.com
 English
-
 繁体中文
繁体中文 -
English
-
عربي
-
Pilipino
-
Malay
-
ภาษาไทย
-
IndonesiaName
-
Tiếng Việt


 English
-
繁体中文
-
English
-
عربي
-
Pilipino
-
Malay
-
ภาษาไทย
-
IndonesiaName
-
Tiếng Việt

How to calibrate an analytical balance
Author:Guangzhou Huayuan Scientific Instruments Co., Ltd.
Click:
Time:2025-10-22 20:36:22
1. Preparation Phase
Environmental Requirements: Ensure the balance is placed on a stable platform free from vibrations, drafts, and heat sources. Room temperature should be stable, and direct sunlight must be avoided.
Leveling: Rotate the leveling feet of the balance and observe the built-in spirit level to precisely adjust the bubble to the center of the circular ring. This is the foundation of all calibration procedures.
Warm-up: Power on the balance and allow it to warm up for at least 30 minutes (or follow the manufacturer's recommendations) to ensure the internal circuitry and sensors reach thermal equilibrium.
Cleaning: Use a soft brush or lint-free cloth lightly moistened with alcohol to gently clean the weighing pan and its surroundings, ensuring no dust or residues remain.
2. Perform Internal Calibration (Built-in Weight Calibration - if supported by the balance)
Press the “CAL” (Calibrate) key lightly.
The balance will automatically lock and activate the internal motor to load the built-in reference weight onto the sensor.
Wait a few seconds until the balance automatically completes the calibration and displays a “0.0000g” or “End” signal.
Note: This function requires periodic external calibration by a qualified service provider to ensure the accuracy of the built-in weight.
3. Perform External Calibration (Using an External Standard Weight - Core Step)
Press the “CAL” key. The balance display will typically prompt the required weight to be loaded (e.g., “100.0000g”).
Wear gloves and use anti-static tweezers to handle a metrologically certified Class E2 (or higher) standard weight.
Place the weight gently and steadily at the center of the weighing pan.
Close the draft shield and wait until the reading stabilizes (usually indicated by a stability symbol).
The balance will automatically record and complete the calibration for that point. Then, remove the weight as prompted.
For high-precision balances, this process may need to be performed at multiple points, such as zero, mid-range, and full capacity (e.g., 0g, 50g, 100g).
4. Post-Calibration Verification
After calibration, it is recommended to use another Class E2 (or equivalent) check weight (never use the weight just used for calibration) to perform a verification measurement.
The measurement result should fall within the balance’s Maximum Permissible Error (MPE) range to confirm the calibration’s effectiveness.
Record: Log the date, time, calibration results, weight identification number, and operator’s name in the 《Balance Use and Calibration Record Sheet》.
Your likes are the fuel that keeps me writing.
YouArticle
已有0人推荐
Recommended article
—


Recommended Products
—
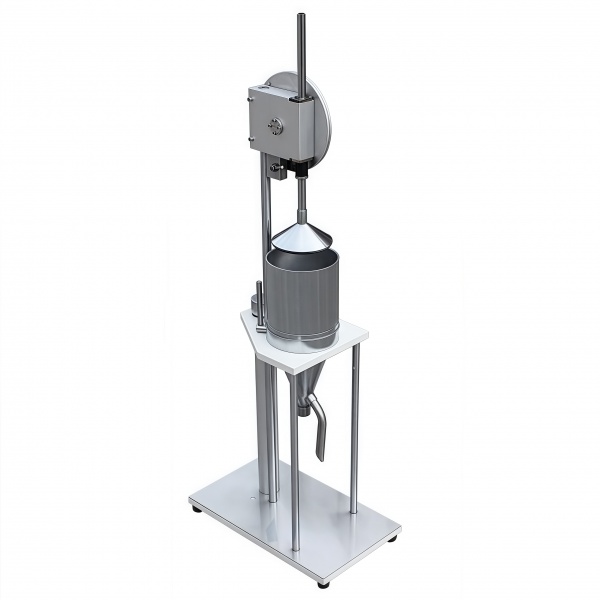
HY-5641 Paper Beating Tester
This instrument is strictly designed according to national standards and the Schopper-Riegler method principle. It adopts a mature manual structure, achieves stable operation through counterweight adjustment, and is equipped with a spring pre-tightening sealing mechanism to ensure reliable sealing during the testing process and accurate results. It is suitable for measuring the water drainage performance of pulp, scientifically evaluating the beating degree and fiber condition, and serves as an
$877.00

ASR-8501(1200*1200mm) Carton Compression Strength Tester
The Intelligent Carton Compression Tester is specifically designed for compression and stacking strength tests of corrugated cartons. It features automatic return, intelligent stop judgment, and data storage. With three test modes, adjustable speed, built-in stacking test, automatic data conversion, and a user-friendly Chinese interface, it ensures efficient and convenient operation. SKU HY000174
$2807.00

ASR-8501(1000*1000mm) Carton Compression Strength Tester
The Intelligent Carton Compression Tester is specifically designed for compression and stacking strength tests of corrugated cartons. It features automatic return, intelligent stop judgment, and data storage. With three test modes, adjustable speed, built-in stacking test, automatic data conversion, and a user-friendly Chinese interface, it ensures efficient and convenient operation. SKU HY000173
$2667.00

ASR-8501(800*800mm) Carton Compression Strength Tester
The Intelligent Carton Compression Tester is specifically designed for compression and stacking strength tests of corrugated cartons. It features automatic return, intelligent stop judgment, and data storage. With three test modes, adjustable speed, built-in stacking test, automatic data conversion, and a user-friendly Chinese interface, it ensures efficient and convenient operation. SKU HY000172
$1895.00

ASR-8501(600*600mm) Carton Compression Strength Tester
The Intelligent Carton Compression Tester is specifically designed for compression and stacking strength tests of corrugated cartons. It features automatic return, intelligent stop judgment, and data storage. With three test modes, adjustable speed, built-in stacking test, automatic data conversion, and a user-friendly Chinese interface, it ensures efficient and convenient operation. SKU HY000171
$1545.00

ASR-8509 (400MM) Paper Tube Compressive Strength Testing Machine
This machine is designed for paper tubes with an outer diameter of up to 400mm. It features automatic test return, precise judgment, and data saving. With adjustable speed, Chinese interface, and multiple unit options, it includes a mini printer for direct result output, ensuring intelligent and convenient operation. SKU HY000170
$1432.00

ASR-8509 (200MM) Paper Tube Compressive Strength Testing Machine
This machine is designed for paper tubes with an outer diameter of up to 200mm. It features automatic test return, precise judgment, and data saving. With adjustable speed, Chinese interface, and multiple unit options, it includes a mini printer for direct result output, ensuring intelligent and convenient operation. SKU HY000169
$1053.00

ASR-KBDLQ Cobb Absorbency Sampler Paper Basis Weight Sampler
ASR-KBDLQ Cobb Absorbency Sampler is designed in accordance with the QB/T 1671 standard and utilizes an imported blade module to accurately cut standard samples of corrugated paper, paper, and other materials. With its compact structure and labor-saving operation, it serves as an essential specialized sampling tool for both scientific research and production applications. SKU HY000168
$386.00

ASR-DLQ(7MM) Paper Basis Weight Sampler
ASR-DLQ(7MM) Paper Basis Weight Sampler is designed in accordance with the QB/T 1671 standard and utilizes an imported blade module to accurately cut standard samples of corrugated paper, paper, and other materials. With its compact structure and labor-saving operation, it serves as an essential specialized sampling tool for both scientific research and production applications. SKU HY000167
$323.00

ASR-DLQ(5MM) Paper Basis Weight Sampler
ASR-DLQ(5MM) Paper Basis Weight Sampler is designed in accordance with the QB/T 1671 standard and utilizes an imported blade module to accurately cut standard samples of corrugated paper, paper, and other materials. With its compact structure and labor-saving operation, it serves as an essential specialized sampling tool for both scientific research and production applications. SKU HY000166
$323.00

ASR-8503D Basis Weight Sampler / Quantitative Cutter
ASR-8503D Basis Weight Sampler is designed for cutting ring crush test specimens and other test samples. Its precision-engineered blade assembly ensures clean and perfectly parallel edges on every specimen. SKU HY000165
$298.00

ASR-1021(500KG) Touch Screen Single Arm Tensile Testing Machine
ASR-1021(500KG)The equipment adopts fully digital control AC motor, with speed accuracy of ±0.5%, ensuring smooth and low-noise operation. It features an aluminum extrusion painted structure, built-in dual ball screws and guide columns, providing high rigidity and low resistance. The machine delivers stable performance, accurate measurement, and user-friendly software operation. SKU HY000164
$1503.00
ADDRESS
Room 601, 6th Floor, No. 433-435 Zhongshan Avenue Middle, Tianhe District, Guangzhou City, Guangdong Province, China
CONTACT
Ph:13420835486
Mail:hehaixiong@hykygz.com

点击右上角
分享给朋友吧
NEWSLETTER
All product images, trademarks, and logos displayed on this website are the property of their respective owners. The use of them on this site is for the purpose of sales and identification only.

